


For strong northern-lights photos tonight, shoot RAW on a tripod with a fast wide-angle lens, focus manually on a bright star, and set your camera to ISO 800 to 3200 with a 2 to 8 second exposure depending on how fast the aurora is moving. Pack a spare battery in an inner pocket and a small torch for focusing gear in the dark. Everything else in revontulikuvaus, the Finnish term for aurora photography, builds on that one habit: settle on your starting exposure fast, then adjust from there.
TL;DR:
- Use a fast wide-angle lens at f/2.8 or wider, and set ISO between 800 and 3200 to gather enough light without excessive noise.
- Match your shutter speed to aurora movement, with 2 to 4 seconds for fast curtains and up to 15 seconds for slow, glowing bands.
- Focus manually on a bright star using live view zoom, and verify sharpness on the camera’s playback before capturing the shot.
- Keep spare batteries warm in inner pockets and operate the camera with a remote release or timer to prevent shake during long exposures.
- Choose dark, clear nights with high geomagnetic activity (Kp-index 3 or higher) between 10 PM and 2 AM for optimal aurora visibility and photo quality.
Table of Contents
- Quick Camera Settings for Revontulikuvaus Vinkit
- What Gear Actually Improves Your Aurora Shots?
- How Do You Focus a Camera in the Dark?
- Composition Tricks That Make Aurora Photos Memorable
- Can You Photograph the Northern Lights With a Phone?
- Staying Warm and Keeping Your Gear Working
- When and Where Should You Shoot for the Best Aurora?
- Editing RAW Aurora Files Without Overdoing It
- Your Night-Of Aurora Photography Checklist
- Fixing Blurry Aurora and Star Trails
- Why Patience Beats Chasing Perfect Gear
- Book a Base Built Around Aurora Nights
- Sources
Quick Camera Settings for Revontulikuvaus Vinkit
Aurora speed decides almost everything about your settings. A slow, glowing band across the sky behaves differently in front of a camera than a fast curtain rippling overhead, so match your shutter speed to what’s actually happening above you.
- Slow, diffuse aurora: ISO 1600 to 3200, shutter 8 to 15 seconds, aperture as wide as your lens allows (f/2.8 or wider is ideal).
- Medium activity, gentle movement: ISO 1600, shutter 4 to 8 seconds, same wide aperture.
- Fast, dancing curtains: ISO 800 to 1600, shutter 2 to 4 seconds to freeze structure instead of blurring it into a green haze.
Photography guides from Suljin put the working range at roughly ISO 800 to 3200 and shutter speeds of 2 to 15 seconds, with aperture pushed as wide as the lens permits. The faster the aurora moves, the shorter your shutter needs to be, or you’ll lose the ribbon and rays and end up with a flat green smear.
Set white balance to around 3400 to 4000K, or just leave it on auto and fix it later, because you should always be shooting RAW. RAW files hold far more color and shadow detail than JPEGs, which matters enormously once you start pulling detail out of a dark foreground.
What Gear Actually Improves Your Aurora Shots?
A fast wide-angle lens, something in the 14mm to 24mm range with an aperture of f/2.8 or wider, is the single biggest upgrade you can make. It pulls in more sky, gathers more light per second, and lets you keep exposures short enough to preserve aurora structure. If you don’t own one, a kit lens at its widest aperture still works, just expect to push ISO higher and accept more noise.
- A sturdy tripod that won’t wobble in wind or sink into snow.
- A remote release or your camera’s self timer, since even pressing the shutter button can blur a long exposure.
- Two or three spare batteries, since cold weather drains them fast.
- Hand warmers taped near the battery compartment and an intervalometer if you want time-lapse sequences.
Pro Tip: A phone timer app clipped to your tripod’s mounting plate works as an improvised remote if you forgot the real one at the cabin.
How Do You Focus a Camera in the Dark?
Autofocus almost always fails on stars and aurora, so switch to manual before you leave your accommodation, not after you’re standing in the snow fumbling with menus.
- Switch your lens to manual focus and set it near the infinity mark.
- Turn on live view, zoom in digitally on a bright star or distant light, and adjust focus until it’s a tight point rather than a fuzzy blob.
- Take a test shot at your starting exposure, then zoom into the playback screen to check sharpness.
- Adjust exposure from there: if the aurora looks smeared, shorten the shutter; if the frame looks too dark, raise ISO before you lengthen the shutter further.
A dependable starting point is aperture wide open, ISO 1600, and a shutter around 5 to 8 seconds. Focus on a star with live view magnification, since this technique is standard advice across aurora photography guides, then shorten your shutter toward 2 to 4 seconds the moment the lights start moving quickly.
Composition Tricks That Make Aurora Photos Memorable
A sky full of green light gets old fast if there’s nothing beneath it. Foreground elements give your image scale, a sense of place, and a reason to look twice.
- Frame snow-covered trees, a cabin, a frozen lake, or a fell silhouette along the bottom third of your shot.
- If a person is in frame, have them stand completely still and use a faint, warm light, like a headlamp on its lowest setting, held briefly rather than left on.
- For arcs stretching horizon to horizon, shoot wide and low; for curtains directly overhead, tilt up and let the foreground shrink to a thin dark band.
Canon’s aurora photography guidance recommends exactly this: build the shot around a foreground subject rather than treating the sky as the entire photograph. It’s the difference between a nice sky and a photo someone remembers.
Can You Photograph the Northern Lights With a Phone?
Modern phones handle aurora better than most people expect, but only with the right mode and a stable base. Night Mode works fine for a quick record shot, but Pro or manual mode gives you real control over exposure length, which matters far more once the lights start moving.
- Switch to Pro or manual mode when available, and set exposure between 15 and 25 seconds with ISO around 500 to 800.
- Mount the phone on a small tripod or brace it against something solid; handheld aurora shots almost never come out sharp.
- Use the built-in 2 second timer instead of tapping the shutter directly, since that tap alone can blur a 20 second exposure.
- Lock focus manually on a distant light before shooting, and keep the moon or streetlights out of frame if you can.
According to Suljin’s phone photography guide, sample settings around ISO 500 to 800 with 15 to 25 second exposures have produced usable results on recent phone models, provided the phone stays perfectly still. That last part is the real challenge. A phone shakes far more easily than a camera on a tripod, so a cheap pocket tripod or even a beanie bag on a fence post often matters more than the phone model itself.
Staying Warm and Keeping Your Gear Working
Cold drains batteries fast, and a battery that reads full at home can die within an hour at negative 20 Celsius. Rotate spare batteries between your camera and an inner jacket pocket so body heat keeps the next one ready to swap in.
- Carry at least two spare batteries against your body, not in a bag.
- Bring your camera indoors inside a sealed bag so it warms up gradually and condensation forms on the bag, not the lens.
- Wear layered wool or thermal base layers, a windproof outer shell, and mittens with a thin glove liner so you can operate dials without bare fingers.
Rovaniemi-info’s aurora photography guide notes that cold weather significantly reduces battery capacity, which is why keeping spares warm matters as much as any camera setting.
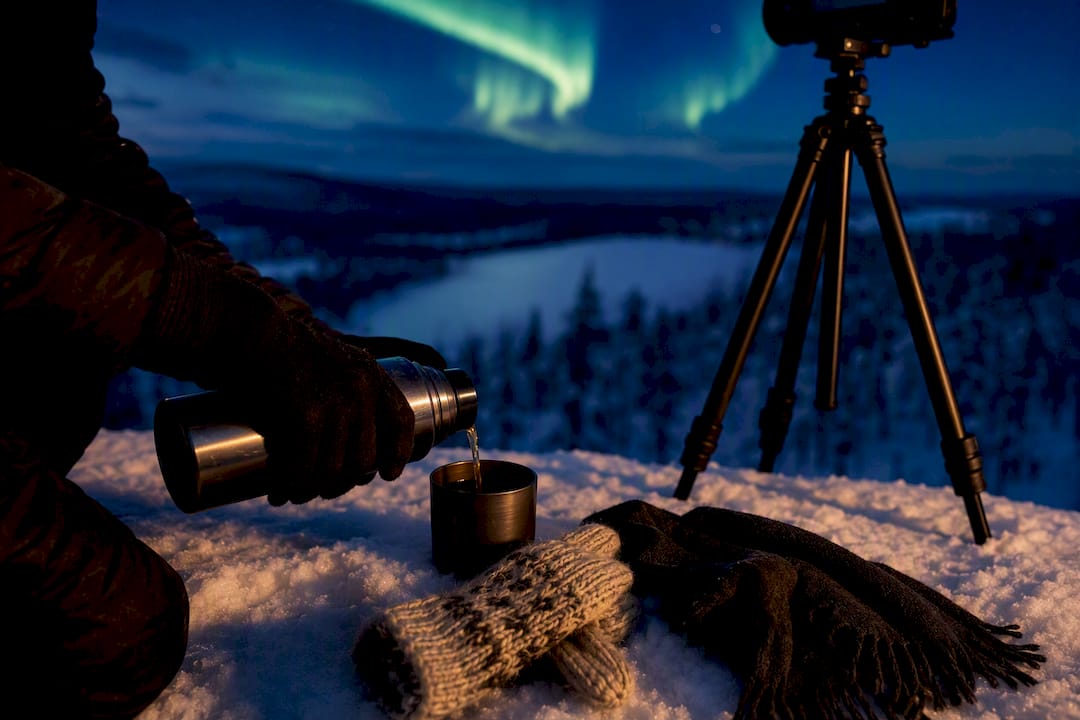
Pro Tip: Pack a thermos of something hot and drink it while your camera runs a timer sequence. Waiting for aurora to build is most of the job, and staying warm keeps you out longer.
When and Where Should You Shoot for the Best Aurora?
Timing separates a wasted night from a great one. The Kp-index measures geomagnetic activity on a scale of 0 to 9, and while a Kp of 3 or higher generally improves your odds at high latitudes, clear, dark skies matter just as much as the index number.
- Check a Kp-index tracker or aurora forecast app alongside a cloud cover forecast before committing to a location.
- Aim for the window between 10 PM and 2 AM, when skies are darkest and geomagnetic activity often peaks.
- Late autumn through early spring gives you the long, dark nights aurora photography needs.
- Drive away from town lighting; even modest light pollution flattens contrast in your photos.
Combining a Kp-index app with a separate cloud forecast, rather than trusting either alone, is standard practice among aurora chasers.
Editing RAW Aurora Files Without Overdoing It
RAW files give you the latitude to recover color and shadow detail that JPEGs simply discard, which is exactly why shooting RAW matters more here than in most other photography genres. A primer on RAW shooting explains why professionals default to it for exactly this kind of unpredictable, high-contrast lighting.
- Start with exposure and white balance, nudging the aurora toward the green or violet it actually showed, not an exaggerated neon version.
- Pull down highlights slightly to tame blown-out bright patches within the aurora, then lift shadows just enough to reveal foreground detail.
- Apply modest noise reduction, since high ISO shots need it, but stop before fine star detail turns to mush.
Resist the urge to crank saturation. Oversaturated greens with heavy-handed sharpening create ugly halos around bright aurora bands, and that look rarely survives being viewed at full size.
Your Night-Of Aurora Photography Checklist
- Charge all batteries, format memory cards, and pack warm layers before leaving.
- At your location, compose with a foreground element, lock manual focus on a star, and take a test shot.
- Check the histogram and image sharpness, then adjust ISO or shutter as needed.
- When the aurora speeds up, shorten your shutter and consider switching to burst mode to catch peak structure.
Fixing Blurry Aurora and Star Trails
Two problems show up more than any other in beginner aurora shots: smeared, featureless aurora and stars that streak instead of sitting as clean points of light.
Blurred aurora almost always means your shutter speed was too long for how fast the lights were moving. If your green band looks like a flat wash of color with no ribbons or rays, cut your shutter time in half on the next shot, even if that means raising ISO to compensate. Fast curtains need 2 to 4 seconds; slower, glowing bands can tolerate 10 seconds or more without losing shape.
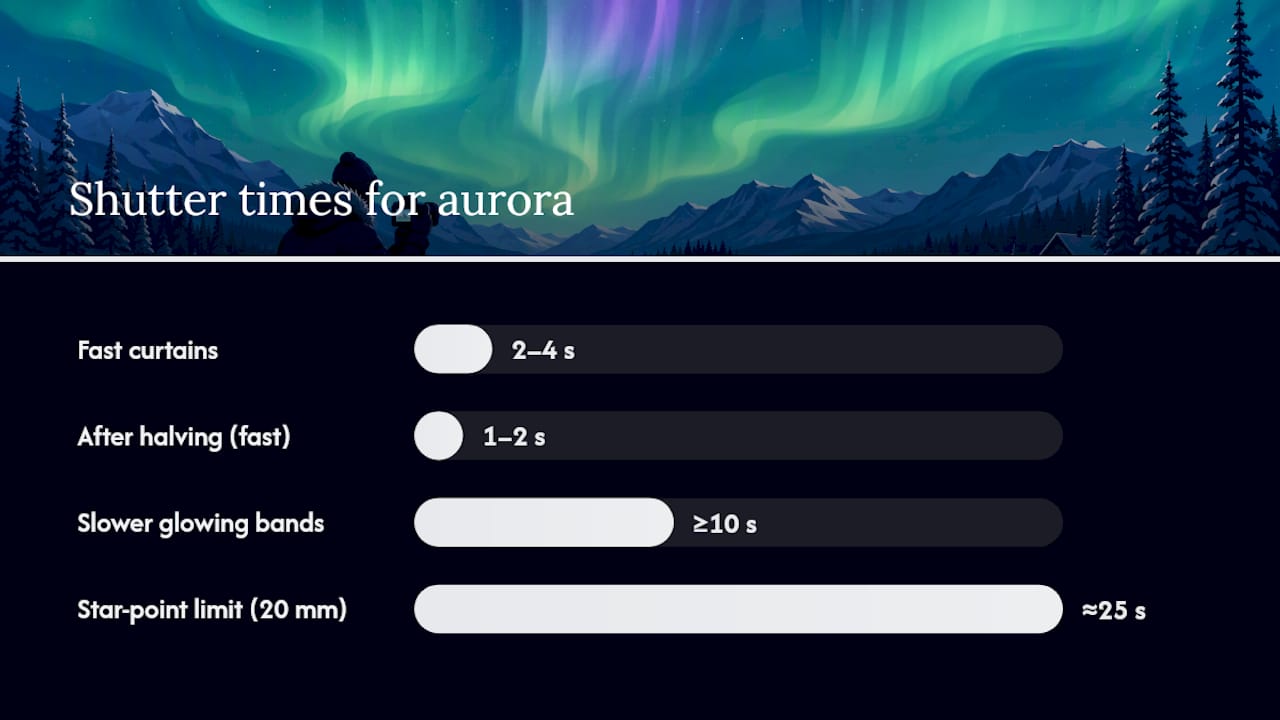
Star trails happen for a different reason entirely: your exposure ran too long relative to your lens’s focal length. A rough rule many photographers use is dividing 500 by your lens’s focal length in millimeters to estimate the longest shutter speed that keeps stars as points rather than short arcs. A 20mm lens gets you roughly 25 seconds before trailing becomes visible, but aurora photography rarely needs exposures that long anyway.
A third common issue is a soft, out-of-focus frame that looked sharp on the small camera screen. This usually means live view magnification wasn’t zoomed in enough during focusing, or the focus ring shifted slightly when you touched the lens afterward. Tape the focus ring in place once you’ve nailed it, and recheck sharpness on playback every few shots rather than trusting your eyes on a tiny screen in the dark.
Why Patience Beats Chasing Perfect Gear
Every aurora photographer I’ve studied credits repetition over equipment. The photographers who consistently bring home sharp, well-composed shots are the ones who’ve stood outside on a dozen mediocre nights, refining focus and framing until it becomes automatic. A comfortable, well-located base changes that math entirely: staying somewhere with easy aurora access and guided aurora experiences means you can step outside repeatedly without the exhaustion that usually cuts a trip short.
— Juho
Book a Base Built Around Aurora Nights
A good aurora photography base offers a warm, comfortable place minutes from dark, open sky, so you can step outside for a test shot, warm up by the fire, and go back out the moment the forecast improves. Guided aurora outings pair you with someone who already knows tonight’s Kp-index and cloud cover, so you’re not burning your one clear window on trial and error.
The boutique resort and Parkside apartments sit within Pyhä-Luosto National Park, with terrace viewing and guided outings built into several seasonal packages. This setup suits travelers who want fewer logistics and more actual shooting time rather than long drives chasing clear skies on their own. Check current availability and Arctic winter packages to plan a stay around the darkest, clearest nights of your visit.
Sources
- Saturnaisia otoksia tanssivista valoista: Menna Hossamin vinkit revontulien kuvaamiseen
- Näin kuvaat revontulia – parhaat kameran asetukset – Suljin
- Rovaniemi-info
